Culture
Heave DIY: Wilted Wonderland

Each week in Heave DIY, Seetha Sankaranarayan journeys into the depths of her junk drawer to refashion old items into on-trend accessories, with minimal tools required.
My cousin has saved every bouquet of roses her husband has ever given her. They hang upturned on the walls of their bedroom, the dusty red petals standing in stark contrast to the mustard yellow walls.
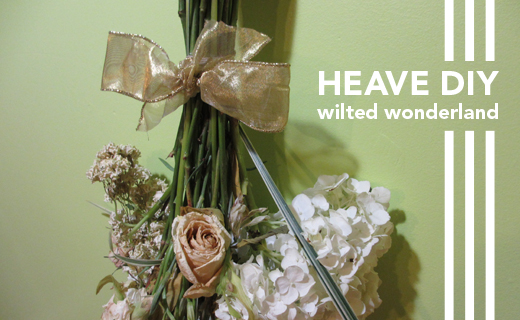
Hanging up cut flowers to dry is a great way to preserve a memorable bundle of blooms and to give your space a little rustic feel. A bouquet sagging in a vase on your table takes on a completely different form when hanging freely on the wall. While it may seem like a no-brainer of a project, friends have often asked me how best to go about rigging it up without damaging the already wilting flowers.
If you have a particularly large bouquet in a vase, split up the flowers into two separate bundles to keep them from getting crushed against each other and the wall. A thin cord or ribbon works best for tying them together and securing them to a hook. Covering the cord with a wider grosgrain ribbon takes it from bundle of stems to intentional decoration.
According to ProFlowers, sunlight and extreme heat are bad news for drying blossoms, so be sure to hang yours in a dim area. From personal experience, I recommend placing the nail well above shoulder-level so that you don’t risk knocking into the bouquet and sending dried leaves and petals flying all over the room. You’ll also get a better view of the blossoms and less of the stems.
After hanging, wait two to three weeks to ensure that the bouquet is completely dry before moving it. Then, lightly mist the flowers with hairspray as an extra defense against breakage–the leaves will be especially brittle.
Materials:
-a wilting bouquet
-a rubber band
-a nail
-scissors
-twine, cord or thin ribbon
-wide ribbon
-nails or hooks
Time: 15 minutes

1) Remove the flowers from water and secure the bouquet with a rubber band about five inches from the ends of the stems.
2) Set the bouquet on a flat surface and dry the stems with a paper towel.
3) Clip away excess leaves to give the flowers some space.
4) Remove the rubber band. Wrap the cord around the stems several times and knot it tightly. Quick trick: Right-over-left, left-over-right knots are extra secure.
5) Cut about two feet of cord and tie it tightly around the knot. Knot the free ends together. You want the loop to sit just an inch or so above the ends of the stems.
6) Cut a length of decorative ribbon and tie it in a bow around the knots.
7) Put a nail in the wall and gently hang the bouquet to dry. Done and done.
Variations

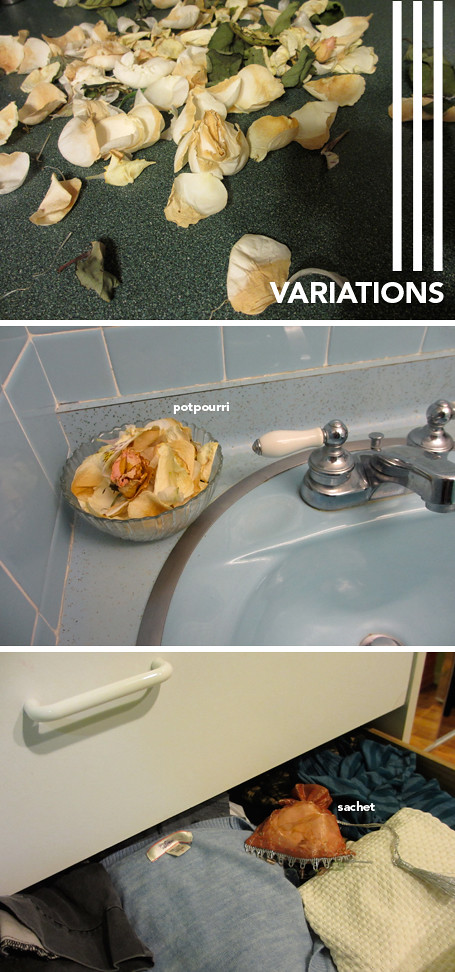
If you’re heavy-handed like me, you might end up with a whole mess of loose petals. Save them and make your own potpourri by placing them in a small bowl. Or, find a little pouch made of thin material and fill it to create a sachet for your dresser drawer.
If the result after two weeks looks more like dead foliage than country-inspired décor, skip the trashcan or sink disposal and compost the flowers in the grassy space nearest to you.
I love these solutions. It’s been a long time since I’ve seen potpourri used in the house, it adds a nice touch and doesn’t look so 80’s if you choose the right bowl. I’m envisioning lavender colored petals and a metallic receptacle
[…] 3, 2012: “Heave DIY: Wilted Wonderland” Preserving a favorite bouquet (with Pinterest-friendly […]
[…] 3, 2012: “Heave DIY: Wilted Wonderland” Preserving a favorite bouquet (with Pinterest-friendly […]